Toolbar Manager
Overview
Reference material for Toolbar Manager in WinTAK, sourced from the official WinTAK 5.7 Software User Manual (26 March 2026).
Manual Reference

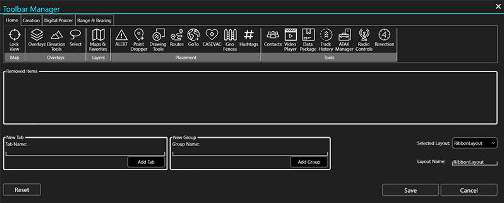
Select Toolbar Manager from the additional tools menu in the upper left corner to customize the Toolbar. Buttons, groups and tabs can be rearranged, customized and removed here to meet the unique needs of different user groups.
To rearrange individual icons within the Toolbar Manager, drag and drop them to the new desired location. Groups can also be dragged to different areas of the toolbar and Tabs can be dragged to appear in a different order on the toolbar.
Creating tabs and groups
To create a new tab, select the New Tab window, fill in a tab name and click Add Tab. An existing group now may be dragged and dropped into the tab. Once a group has been added to the tab, individual icons can be dragged in. New groups are created in a similar fashion using the New Group box.

Hiding icons and saving layouts
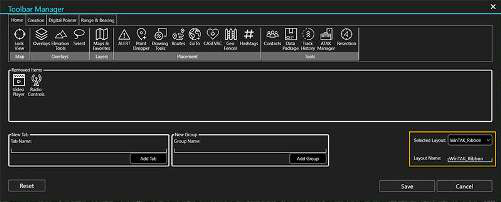
To hide icons, drag them to the Removed Items box. Select Save when finished and the Toolbar will reflect the changes. Reset will return the Toolbar to its default configuration.

After the changes have been made, they can be saved with a custom layout name. This layout then becomes the default for WinTAK. Several custom layouts can be saved and changed to at any time by returning to Toolbar Manager and changing the selected layout.
Source
WinTAK Software User Manual, Version 5.7, 26 March 2026, page 83.