Toolbar Manager
Overview
Reference material for the Toolbar Manager tool/feature in ATAK, sourced from the official ATAK 5.8 Software User Manual (chapter 29, "Toolbar Manager").
Manual Reference
The ATAK toolbar is customizable allowing for multiple layouts to be available to quickly switch to or edit. The default toolbar contains five tools, a sixth tool can be added on a smartphone device with up to ten tools supported on a tablet device.
Select the Additional Tools button, beside the toolbar, to access the other available tools which are displayed in a grid format by default.


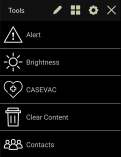
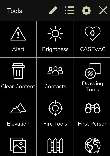
Toggle between the List View and Grid View to change the layout of the additional tools interface. To change the tools layout to list format, select the List View button. Selecting Grid View will return the layout to the grid format.

Modifying a Toolbar
Select Edit Toolbar to launch the toolbar Edit Mode. Any user-created toolbar may be modified by selecting Edit Toolbar at any time.

Note: When entering Edit Mode through the icon on the toolbar, the current toolbar will be presented to modify. If this is the default toolbar, a copy of it will be used as the starting point for the new toolbar since the default toolbar cannot be modified. To start with a “clean” toolbar, go to the toolbars list and choose to Add Toolbar instead.
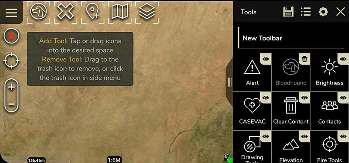
The following actions can be done when in Create/Edit Mode:
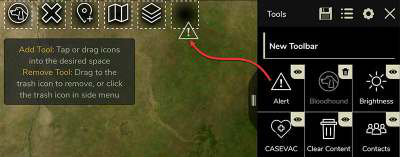
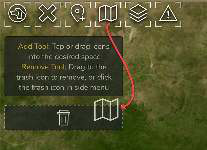
• Name/rename the toolbar • Add and/or remove a tool on the toolbar • Change the visibility of a tool in the listing
To add a tool to the toolbar, long-press and drag the icon into the position desired.
If an icon is already in the space, dragging the new tool into the space will replace it. Long-press and drag a tool from the toolbar to the delete area on the map to delete it from the toolbar and return it to the main tool list. The are several icons that appear on the tools when in Edit Mode that provide the ability to manage the tool icons both within the tool list and on the main toolbar.
The visibility icon indicates that a tool is displayed in the main toolbar list after the editing panel is closed. Select this icon to remove it from the tool list. It may be made visible again when in Edit Mode.

The visibility icon with a slash through it indicates that the tool will not be visible at all after closing Edit Mode. Select it to return the tool icon to the tool list.

The delete icon gives the user another way to remove a tool from the main toolbar. Select it and the tool will be removed from the toolbar and moved back to the tool list. An icon with the trashcan also indicates that the tool will be visible on the toolbar but not visible in the list when Edit Mode is closed.

After completing all desired modifications to the toolbar, select Save. The toolbar will appear in ATAK’s available list of toolbars.

Export Custom Toolbar
To save a toolbar outside of ATAK, select Export Toolbar. The exported file will be saved to /sdcard/atak/export/. After exporting, the toolbar can be sent to another TAK user. The toolbar will also be saved to the toolbar list.

Note: A toolbar can also be imported using ATAK Import Manager or selecting the Import Toolbar button in the Toolbar Manager panel.
Toolbar Management
Select the Toolbar Manager button to see a list of all the currently available toolbars.


Select Add Toolbar at the top to enter Edit Mode with a new “clean” toolbar. No tools are initially present on the toolbar when a new toolbar is created through Toolbar Manager. Toolbar creation uses the same actions as when modifying an existing toolbar. These are described in the Modifying a Toolbar section. Select Save after the edits are complete and the new toolbar will appear in the toolbar list.
Select Import Toolbar to import a previously saved toolbar from the Android file system. Note: Another TAK user can also send a toolbar in a Data Package that will be auto-imported into the receiver’s toolbar list.

Toolbar selection is also done in the Toolbar Manager. Select the radio toggle button to choose which toolbar to use. Toolbars may be edited by selecting Edit on the line with its name. Remove a toolbar by selecting Delete.
A legacy toolbar option is available as well. The legacy tool bar can be selected during TAK device setup by selecting Action Bar Experience and then the Right Side (Legacy) option. The option to switch to the legacy toolbar can be accessed after device setup by navigating to Additional Tools and Plugins > Settings > Support > TAK Initial Device Configurations.
Source
ATAK 5.8 Software User Manual, 07 July 2026 (Unclassified), pages 89–91.