Route Planning and Navigation
Overview
Reference material for the Route Planning and Navigation tool/feature in ATAK, sourced from the official ATAK 5.8 Software User Manual (chapter 4, "Route Planning and Navigation").
Manual Reference
Route planning and navigation capabilities allow the user to create or modify routes and set navigation objectives.

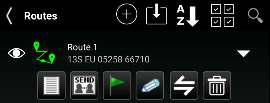
The Routes tool allows users to quickly create, view and modify routes. Select the Routes icon from the Additional Tools and Plug-ins window to see a list of existing routes, create new routes, import routes, sort, export, delete routes and search for routes. For an individual route, the user can view the details, send, navigate to, edit, reverse or delete the selected route.
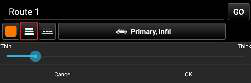
Route line thickness, line style and opacity can be changed as well. To change route line thickness, select the Line Thickness button to the right of the Color button and use the slider to adjust to the desired line thickness.
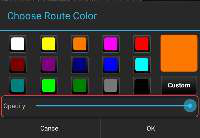
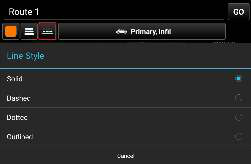
To change the route line style, select the Line Style button to the right of the Line Thickness button and choose one of the available line style options. Route color opacity can be adjusted by selecting the Color button and then adjusting the opacity slider in the Choose Route Color window. If the Show All box in the lower right is unchecked, only routes that are visible in the current map screen will be listed.
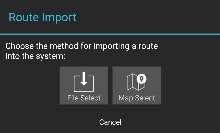
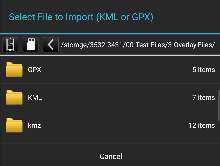
Select the Import icon to import a route in one of two ways: from a file or from a line on the map. Choose File Select to navigate to the location of the saved routes (in KML or GPX format) and select the desired route. The saved route will be imported and displayed on the map and will be listed in the Overlay Manager under the Navigation category. Tap Map Select to choose a line present on the map and have it converted into a route. Examples of lines that can be used include a drawing tool polyline, a drawing tool telestration line or a line within a KML overlay.
Routes
To create a new route, tap +, select the route type, and follow the onscreen instructions. Select a location on the map to make it part of the route or long press to create check points along the route. Select Draw to manually create a route segment by using a finger drag motion on the map.

Once the End button is selected, the Route Details window opens. Within the Details window, choose to: navigate to the route by selecting the GO button, change the color and opacity of the route, change the line width of the route, change the route details and modify the check points. Select Undo to undo any modifications to the check points.
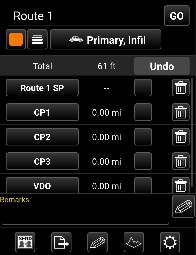
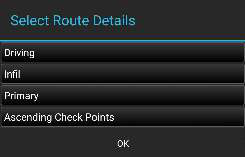
The Route Details may be changed by selecting the Primary, Infil button, next to the Line Style button. Change the method of movement (driving, walking, etc.); Infil or Exfil; Primary or Secondary, and Ascending or Descending check points.
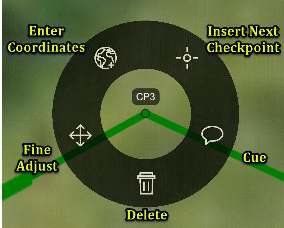
Check points can be modified as follows: Rename, Add Cues, Align (only available when using a route alignment plug-in) or Delete. To rename the check point, select the current check point and a Rename window will appear. After changing the name, select Done. To add a cue to a check point, select the box to the right of the distance column. The Cues window will appear, and a preset cue may be selected, or a custom cue may be entered. When the desired cue is added, select OK.
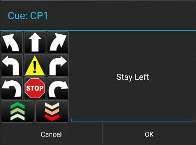
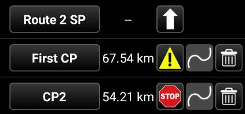
The bottom of the route details screen provides the option to Send, Export, Edit, view the Elevation Profile, and view/modify Route Preferences. When the Send option is selected, the route may be sent to selected recipients on the network or broadcast to all available recipients. The route can be exported to a file in KML, GPX, KMZ or a Shapefile format. Exported files can be found in the “/atak/export” folder.

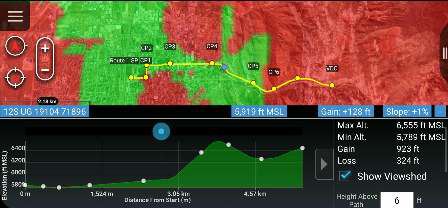
The Elevation Profile icon allows the ability to view the elevation profile for that route. The Elevation Profile provides information on Total Distance, Maximum Altitude, Minimum Altitude, Gain and Loss. If the Show Viewshed checkbox is checked, a viewshed will appear on the route and trace the route, as the Elevation Profile blue dot is moved along the graph.
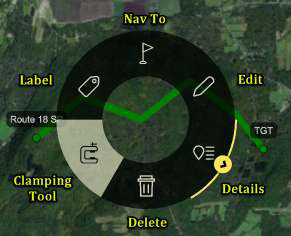
The Route Tool offers two different sets of radial options depending on which portion of the route has been selected. A line segment or a point can be selected.
Navigation
Route navigation can be initiated by selecting the route’s navigation radial option or by selecting the route’s Navigation icon in the Routes listing. Navigation information will appear in the top left corner.
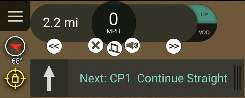

If a cue has been established, when the user gets close to a check point, the cue for that check point will be displayed; if the volume is turned up, the cue will be audible. Voice Cues can be turned off by selecting the Mute icon. Speed units can be changed during navigation by tapping the top row of the navigation display to cycle between MPH, KMH, KN and mps. The displayed cue can be collapsed to provide more screen space.
The arrow buttons on either side of the navigation information allow the user to move forward to the next check point or move back to the previous check point. Selecting the x will end navigation. Tapping on the distance or speed displayed will toggle the units between miles/mph, km/kmph, nm/kt, and km/mps.
When navigating a route while tilted in 3D mode, a 3D billboard feature can be enabled to pop up an image associated with a marker. As the user approaches a marker with an attached image, the image associated with that marker will pop up, once the user is within the defined billboard render distance. The image remains displayed until the user has travelled past the marker.
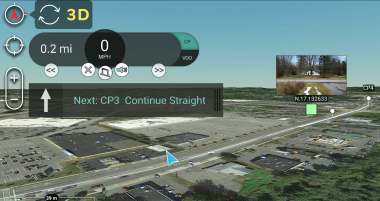
The default distance for images to appear during navigation can be changed in Settings > Tool Preferences > Specific Tool Preferences > Route Preferences > Billboard Render Distance. The billboard feature can also be turned off by toggling the Settings > Tool Preferences > Specific Tool Preferences > Route Preferences > Show Attachment Billboards.
Selecting the Quick Nav icon will begin navigation (a bloodhound) to any point, object or route on the map. A pairing line is drawn, and navigation information is displayed in the lower left portion of the screen. Estimated time to the next check point, speed and distance to the next check point are updated as the user moves. See the Bloodhound section in this document for more information.

Source
ATAK 5.8 Software User Manual, 07 July 2026 (Unclassified), pages 24–27.