Data Package Tool
Overview
Reference material for the Data Package Tool tool/feature in ATAK, sourced from the official ATAK 5.8 Software User Manual (chapter 11, "Data Package").
Manual Reference
Select the Data Package icon to open the data package tool. When opened, the tool will display any data packages that have been stored, as well as provide options for building new packages, downloading them from a server, deleting and exporting them. When preparing for an operation, a team leader may prepare a route, place markers, shapes and imagery on that map that pertains to operation objectives. All of these items can be included in a data package and sent to each person on the team. This allows everyone on the team to have the same operational information. In addition to Map Items (with or without attachments), external files (from the SD card) may be included in a package. The visibility of the package or its elements may be toggled on or off.

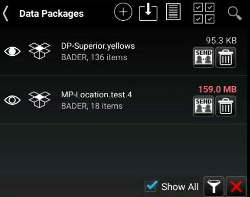
Select the + icon in the Data Package Tool to create a new data package. Choose the selection method: Map Select, File Select, Overlays or Lasso to add items to the data package.
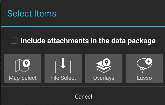
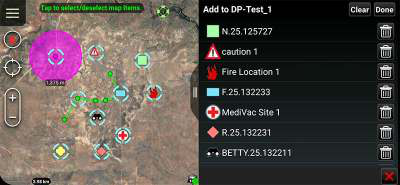
The Map Select option allows for one or more items to be selected from the map and included in the data package. The File Select option displays the file browser which can be navigated to the desired files to be included in the data package.
The Overlays option opens the Overlay Manager tool where categories and individual items can be selected to be included in the data package.
Data Package
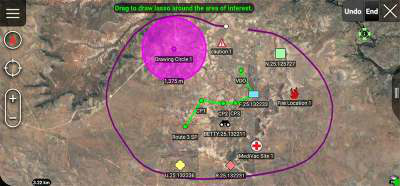
The Lasso option allows for a lasso to be drawn around items on the map to be included in the data package. External Native Data items (such as the map source) are also included when using Lasso. The items that have been selected with the Lasso can be modified to remove any unnecessary items. Choose Done or Select with Lasso when finished, then choose to either create a new Data Package or add the items to an existing Data Package.

When items are added to a data package, a red asterisk will appear on the data package name to indicate it needs to be saved. Select the Save icon to save the changes.

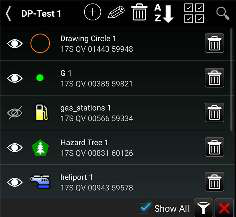
The information under the package name includes the callsign of the user who created the data package and the number of items in the data package. Select the name of the data package to view the included items. Toggle the visibility radio button to control data package content visibility on the map interface.
When done with modifications, select the Send icon to open a list of options for sending the data package including TAK Contact, TAK Server or another application. If the package size is larger than the value set in the Preferences, the size shown in the package list will display red and the user will have an option to override the limit when they send. The threshold size may be changed in Settings > Tool Preferences > Specific Tool Preferences > Data Package Control Preferences.

When sending a data package to a TAK contact, either Select All, Show All or toggle recipients by selecting or de- selecting their corresponding checkboxes.

When the Delete icon is selected, a prompt will appear to remove or leave the contents of the data package on the map interface.

Select the Download icon to access an existing data package from a TAK Server.
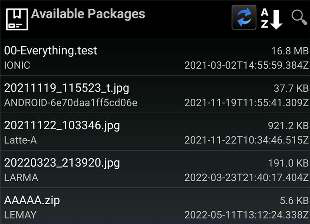
Select the Transfer Log icon on the Data Package Tool menu to view the file transfer log of imported and exported data packages. The Data Package Tool can be customized in Settings > Tool Preferences > Specific Tool Preferences > Data Package Control Preferences.
Select the Multi-Select Action icon to export or delete multiple data packages via the Overlay Manager.
Select the Search icon to locate the desired data package in the listing.
An existing data package can be modified by selecting the + icon and following the same steps as above. Select the data package listing name and then select the Edit icon to change the name or add remarks or hashtags.

Source
ATAK 5.8 Software User Manual, 07 July 2026 (Unclassified), pages 48–50.