Rubber Sheet
Overview
Reference material for the Rubber Sheet tool/feature in ATAK, sourced from the official ATAK 5.7 Software User Manual (chapter 27, "Rubber Sheet").
Manual Reference
The Rubber Sheet Tool allows the ability to add georeferencing to a 2D image or a non-rectified 3D model, as well as edit a 2D image overlay or 3D model that is already georeferenced. Select the Rubber Sheet icon to open the toolbar. Options available on the toolbar are: Import, Sort, Export and Search. Imported Rubber Sheets can be sorted in either alphabetical order or by distance from the Self-Marker.


Working with 2D Imagery
To import a 2D image, pan and zoom the map to the desired location for the imagery. Select the + icon, select the desired image file to import, then select OK. The image will be displayed on the current map view and listed in the Rubber Sheets section of Overlay Manager.
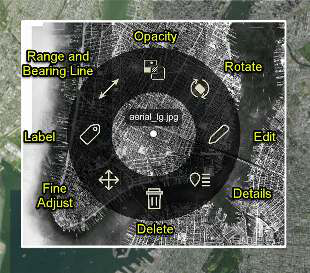
After the image has been imported, selecting it will open the radial menu. Imported Rubber Sheets can be sorted in either alphabetical order or by distance from the Self-Marker.
Select Edit to adjust the size, rotation, and location of the imagery. The controls are the same as for editing Drawing Tools rectangles. Drag a corner to change the rectangle size, drag the midpoint of an edge to change size and rotation, and drag the center to move the entire rectangle. Select Rotate to use two fingers to rotate the rectangle without changing its size. When the image has been adjusted to the desired position on the map, select End Editing.
Select Export from the Rubber Sheets’ Details, or Rubber Sheet category in Overlay Manager to export the rubber sheet image as a KMZ file. The exported result is placed in the atak/tools/rubbersheet folder. For convenience, a prompt will appear to import the exported result as an image overlay.

Working with 3D Imagery
To import a 3D model, pan and zoom the map to the desired location for the model, unless the model is georeferenced. Select the + icon and navigate to the file location of the desired 3D model then select OK.
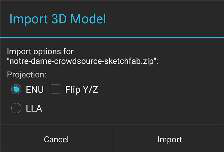
If the model is not geo-rectified, projection options are presented. Choose between ENU (East North Up), with the option to Flip Y/Z, or LLA (Lat, Lon, Alt), then select Import.
Once the model has been imported and placed on the map, the user can select the model to open the radial. To edit the model, select the Edit icon from the radial. Once in edit mode, the model can be dragged on the map, rotated and/or raised or lowered.
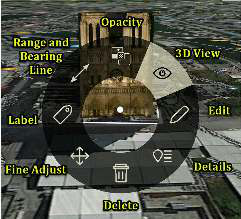
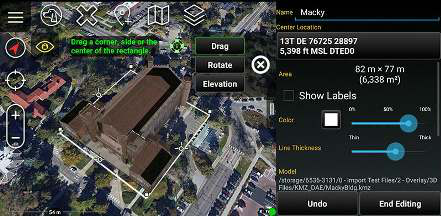
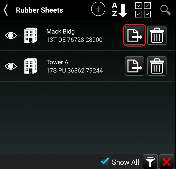
After the model has been positioned as desired, select End Editing. To export it to a georeferenced OBJ 3D model, select Overlay Manager > Rubber Sheets, then select the Export icon. The file is placed in the /atak/ export folder.
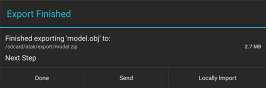
When the export has finished, select whether to import the finished product into ATAK or send it to another user. If the model is imported, it will be placed on the map and will be listed in the Overlay Manager under 3D Models.
Source
ATAK 5.7 Software User Manual, 13 March 2026 (Unclassified), pages 84–85.