Overlay Manager
Overview
Reference material for the Overlay Manager tool/feature in ATAK, sourced from the official ATAK 5.7 Software User Manual (chapter 9, "Overlay Manager").
Manual Reference
Overlay Manager sorts map objects, files and overlays into categories and subcategories. Select the Overlay Manager icon to bring up the list of categories. These include: Teams by color, Alerts, Markers, Data Packages, Navigation, Shapes, Hashtags, Elevation Manager, Location Input Manager, Map Controls, as well as other file types.

Selecting a category will open a detailed listing of the items available in that category. The available items within each category are annotated on the menu entry, allowing the user to reference sub-menu content.

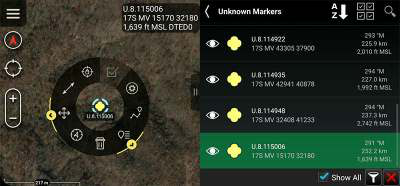
When a displayed item in a specific category is selected, the map view will pan to that item and its radial will display. If the Show All checkbox is checked, all map items in Overlay Manager are listed. If the Show All checkbox is unchecked, Overlay Manager filters map items based on the current map view.
Visibility of any category can be toggled on and off using the Visibility (eye) radio buttons. When the eyeball icon appears white, the corresponding layer objects are visible. An outlined eyeball indicates that the subcategory has some, but not all, objects visible. An eyeball with a line through it corresponds to a layer that is not visible.
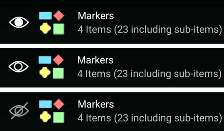
The Markers category offers additional visibility controls for CoT markers allowing for groups of them to be toggled between various display states.
Overlay Manager
After selecting the Markers category, select Slicer, which appears beside the Multi-Select button at the top of the window. CoT markers should now be displayed in a grid format. Tapping the All button will toggle all CoT markers on the map between the three visibility states; visible, points, and hidden.
The left side of the grid breaks up the CoT markers by affiliation, using their first letter to denote the affiliation. Tapping F toggles the visibility states of Friendly markers, tapping N toggles the visibility states of Neutral markers, etc. The letters visible at the top of the grid denote the tracks that these markers belong to: Space (P), Air (A), Ground (G), Sea (S), and Subsurface (U).

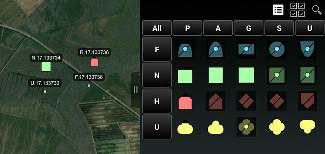
Tapping any letters at the top of the grid will toggle the visibility states of CoT markers that match that track regardless of their affiliation. A specific marker group from a specific affiliation and track can also be toggled by selecting the marker icon at the intersection of the two attributes.
To return to the Overlay Manager marker sub-categories, select the List icon. The objects in a category listing can be sorted alphabetically or by proximity to the Self-Marker. If the Show All checkbox is checked, all map items in Overlay Manager are listed. If the Show All checkbox is unchecked, Overlay Manager filters map items based on the current map view.

Additional filters can be applied to the Markers category. Available filters include Auto Send and Self Authored. The Auto Send filter will only show markers that have the Auto Send feature enabled. The Self-Authored filter will show only markers created on the local device and exclude all markers received from other TAK contacts. To apply, select Filters to open the filter dialog, select a filter to activate it, then OK. To deactivate a filter, select it a second time.


Available overlays can be searched for by selecting the Search icon in the main Overlay Manager toolbar. Select specific categories of overlays to narrow the search results.
Common Operating Picture (COP) Refresh
The COP Refresh removes any temporary map items from the map. These include Self- Markers from other users, SPI’s from other users and ADSB Aircraft Tracks.

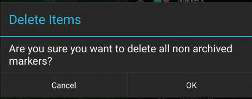
Selecting COP Refresh will display a window to confirm the deleted items.
Hashtags and Sticky Tags
Hashtags and Sticky Tags can be added to map items to aid in categorizing and searching for items.

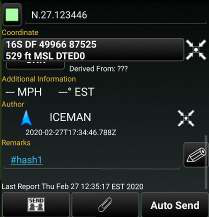
Hashtags can be added to map items in the Remarks field of the Details window or by selecting the Hashtags icon in Overlay Manager. Select + to open the New Hashtag dialog. Enter a Hashtag and select Done.
After the new Hashtag has been created, the Add to Hashtag dialog box appears, and the hashtag can be added to items via Map Select, Lasso or through Overlays. Multiple items may be selected. Once all desired items have been chosen, select Done.


The Overlay Manager will list all created hashtags along with the tagged items. If one of the tagged items is selected, the map will pan to that item and its radial will display.
Select Hashtag to open the Sticky Tags dialog. Enter a name and select + to apply that sticky tag to all subsequently placed map items. More than one sticky tag may be added at a time. To discontinue adding a particular sticky tag to subsequent items, uncheck the checkbox beside the sticky tag.

Select Delete (the trashcan icon) to remove a sticky tag from the list. Select Done to confirm any changes made.To remove hashtags from existing map items, open the Hashtags category and tap Multi-Select. Choose the Remove Hashtags option and then choose the hashtag(s) or map item(s) and confirm the selection by tapping OK.


Multi-Select Export and Delete
Existing overlays can be exported to a file or directly to other users for use in other applications. To export, select the Multi-Select Action icon, select Export, choose a file format, then select each category of overlays that should be included in the export file. Select Previous Exports to send to other users.

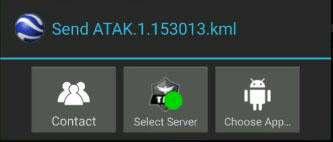
After the selections have been made, tap Export, enter the desired file name and select Export to create the file. A notification will appear when the file has been exported. Select Done to save the file or Send to send to a TAK Contact, TAK Server or an application.

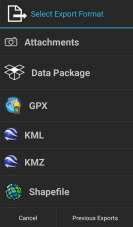

To delete existing overlay items, tap the Multi-Select Action icon, then the Delete icon. Items may be selected as a category (Markers, Shapes, File Overlays, etc.) or individually (specific neutral marker, for instance). When all selections have been made, select the Delete button to remove the specified items and confirm deletion.
Elevation Manager
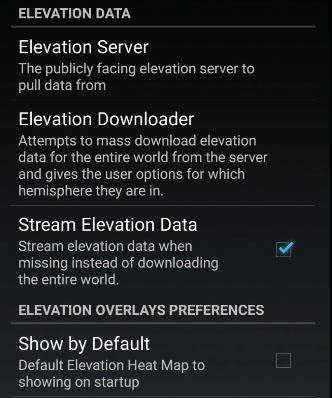
By default, ATAK will stream in elevation data (DTED, SRTM, etc.) if the device was not previously provisioned with its own data. To disable this default preference, navigate to Settings > Tool Preferences > Specific Tool Prefer- ences > Elevation Overlays Preferences and uncheck Stream Elevation Data.
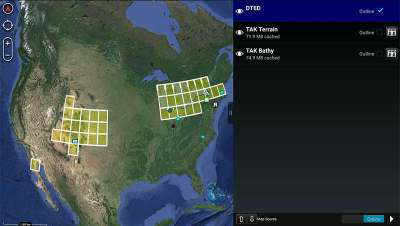
To view the area of coverage, select Overlay Manager, then check the outline checkbox for the DTED layer. The yellow grids indicate where the DTED0 data has been downloaded.
Note: If multiple streaming sources of elevation data are available (i.e., DTED0, SRTM, Quantized Mesh, etc.), the highest resolution source for that area will take precedence when querying elevation data.
The Elevation Manager provides several sources to choose from when analyzing the 3D terrain of a point of interest on the map. While the items on the map will continue to utilize the elevation source that has been configured, the layer currently set to be displayed will change how the elevation is rendered. Like DTED, TAK Terrain and TAK Bathy will be streamed to the device and cached overtime.
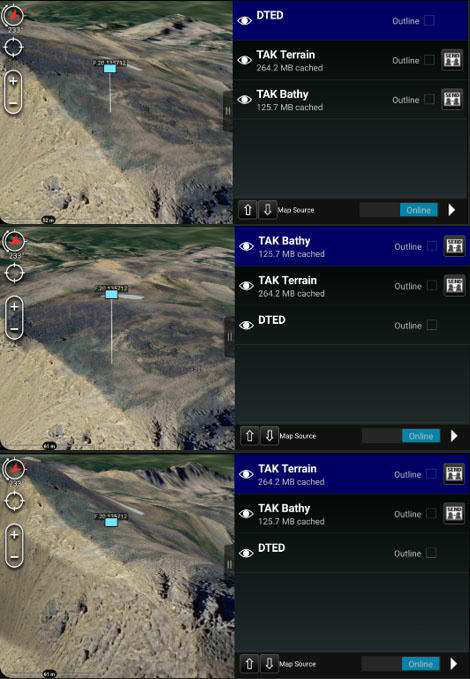
Layer display priority is based on the layer’s position in the list, starting from the top. A layer can be re- ordered by selecting it, highlighted in blue, and then using the arrow buttons located at the bottom of the window. The visibility of each layer can also be toggled off/on by using the visibility radio buttons.
Layers can also be sent to others to initiate the download on their local device, if they don’t already have the layer in their Elevation Manager. Toggling the switch at the bottom of the window to Offline will only allow what has already been cached to be utilized.
File Editing
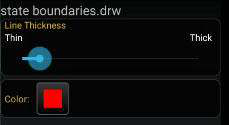
The color and thickness of file overlays (Shapefiles, KMZ, DRW, etc.) can be edited by selecting Edit (pencil icon) from the listing.

Location Input Manager
A list of location providers available in ATAK will be displayed with a description and indication that the location information is currently being supplied. Each location provider can be enabled/disabled by toggling the corresponding checkbox.

The list of providers can be re-ordered by dragging the grey bar on the left-side of a provider up or down. ATAK will attempt to import location information from the first location provider in the list or fall back to the next provider in the list if unsuccessful.
Map Controls
Different aspects of the map can be controlled by using Map Controls in the Overlay Manager. Options include:
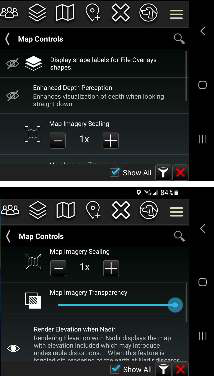

• Displaying shape labels for File Overlay shapes.
• The ability to enhance visualization of depth when looking straight down in 2D mode with the Enhanced Depth Perception option.
• Adjusting the scaling of map imagery (useful for using a different zoom level for imagery with multiple resolution layers).
• The ability to use a slider to change the Map Imagery Transparency.
• The rendering of stars when zooming out to see the globe, and toggling Sun/Moon Illumination.
• Rendering Elevation with Nadir displays the map with elevation included which may introduce undesir- able distortions. When this feature is toggled off, rendering of the earth at Nadir discards elevation.
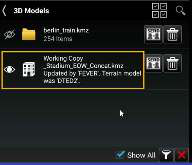
3D Models - Metadata
When ATAK receives a 3D model that has been edited by WinTAK, Overlay Manager displays the metadata associated with the model. Metadata includes information such as the Callsign of the user who performed the editing, terrain model employed, etc.
Other Overlays
Additional overlays are available under the Other Overlays category of Overlay Manager. Select Overlay Manager, then Other Overlays to access the menu. Toggle the Eye icon to Enable/Disable these overlays individually.
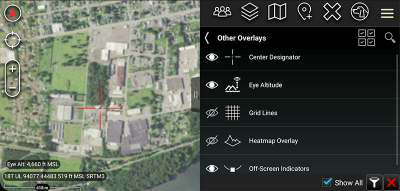
Center Designator can be used to pinpoint a location’s coordinates and elevation data. Altitude can be used to estimate the current altitude based on the zoom level over the map surface.
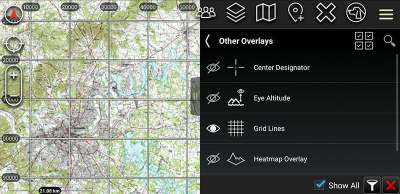
Grid Lines controls the visibility of MGRS grid lines laid over the map surface. These grid lines will automatically adjust based on the current zoom level.
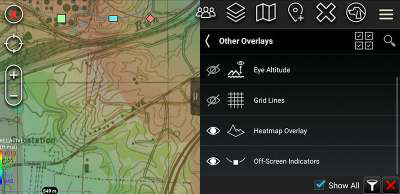
The Heatmap Overlay’s visibility can also be controlled from Other Overlays, it’ll function identically to how it does in Elevation Tools. Lastly, Off-Screen Indicator visibility can also be toggled on/off. Offscreen indicators appear for newly placed/received markers that are no longer in the current map view but are nearby (zoom level dependent).
Source
ATAK 5.7 Software User Manual, 13 March 2026 (Unclassified), pages 35–43.