ATAK Overview
Overview
Reference material for the ATAK Overview tool/feature in ATAK, sourced from the official ATAK 5.7 Software User Manual (chapter 1, "Overview").
Manual Reference
The Team Awareness Kit for Android (ATAK) is a Government-off-the-Shelf (GOTS) software application and mapping framework for mobile devices. ATAK has been designed and developed to run on Android smart devices used in a tactical environment. The ATAK software application is an extensible moving map display that integrates imagery, map and overlay information to provide enhanced collaboration and Situational Awareness (SA) over a tactical meshed network. ATAK promotes information flow and communications from the tactical environment to command enterprise locations. The first time ATAK is opened, or after a Clear Content, a passphrase is auto generated to activate data encryption. The user can supply their own passphrase by using Settings > Callsign and Device Preferences > Encryption Password > Change Encryption Passphrase.
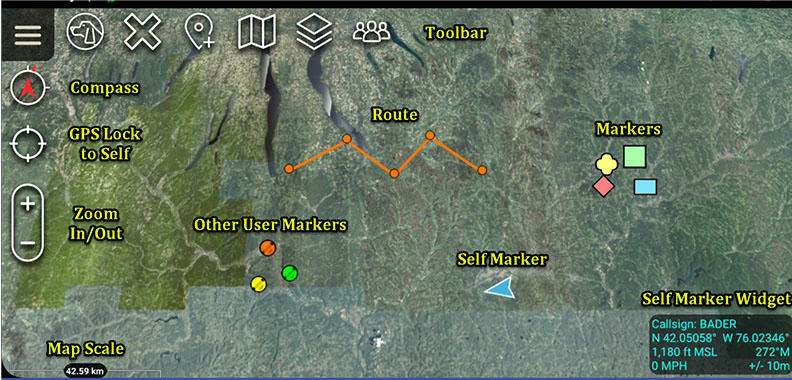
Following this step, the End User License Agreement (EULA) must be accepted. Next, a prompt will appear to allow ATAK to have access to several areas of the device such as its location, pictures, videos, SMS, etc. A prompt will appear with a TAK Device Setup screen to allow further configuration of ATAK. Changes and imports made here can always be updated later. Finally, the Self-Marker can be placed manually on the map if GPS location is not enabled. Do this by following the instructions in red text located in the Self-Marker widget in the lower right corner of the map.
The toolbar sits at the top of the map display. The features whose icons reside on the toolbar are discussed in individual sections of this guide. The three bars to the left of the toolbar (or to the right when using the legacy toolbar option) provide access to all ATAK tools and plug-ins. Long -pressing the map hides the toolbar.
Select the Magnifier icons to zoom in or out on the map. The map can also be zoomed by using two fingers on the screen to pinch and spread the map. The Map Scale displays a 1 inch to X mi/km reference on the map. The scale adjusts with the map when zoomed in and out. Alerts and notifications are displayed in the lower left of the map interface. Hint windows are available to alert users to changes or make suggestions about the use of tools the first time they are opened.
Compass Interactions
The Compass appears in the upper left and is used to control map orientation. It has two primary modes: North Up/Track Up (default) and Manual Map Rotation/Lock. While in North Up/Track Up Mode, single press on the Compass icon to cycle between the North Up and Track Up map orientation. Long press the Compass to call out the additional controls menu where the Manual Rotation/Lock and 3D features are available. Select the Rotation icon to enter Manual Map Rotation/Lock Mode. When in Manual Map Rotation/Lock Mode, rotate the map orientation by pressing on the map with two fingers and pivoting them in the desired direction. Single press on the Compass to lock the screen orientation, signified by the appearance of the lock icon, and again to unlock the orientation for further adjustment. 3D controls are discussed in a separate section.
There are several options for interacting with the Compass icon. Tapping on the compass icon cycles between North Up and Track Up for map viewing. Selecting North Up keeps the map locked with North always at the top of the screen.
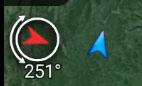

Track Up allows the map to rotate based on the bearing of the device itself, keeping the Self-Marker facing north.
Long-pressing the compass opens the additional controls’ menus for Manual Orientation and 3D Modes. Select the Android back button to center the screen on the Self-Marker. Selecting the Crosshair icon will pan to the Self-Marker and lock the center of the screen to the Self-Marker’s position.
Manual Orientation
To place the map into manual orientation, long-press on the Compass and select the Manual Orientation control option. Once in the manual orientation mode, touch the screen with two fingers and simultaneously rotate both fingers and the map will rotate accordingly. To lock the map in its current rotation, long-press the Compass and tap the Manual Orientation control icon again.
3D View
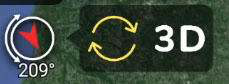
ATAK features 3D viewing of terrain and map items (Elevation Data such as DTED, Shuttle Radar Topography Mission (SRTM), or Quantized Mesh are required to be installed). To enable 3D view, long press on the North Arrow to call out the additional controls menu and select 3D.

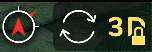
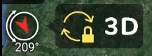
A tilt angle indicator will appear around the edge of the North Arrow when 3D view is active. Touch the screen with two fingers and simulta- neously swipe up or down on the screen to tilt the view angle. Once the appropriate viewing angle is set, select the 3D Lock icon to retain this view while panning the map. While viewing the map from an angle, some map items will appear raised above the map surface if they have defined elevations. ATAK also allows the view to tilt to a 90-degree angle to look at a marker/image from a straight on perspective.
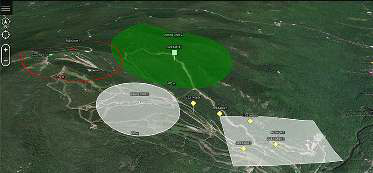

3D Models
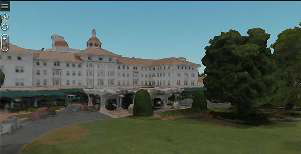
ATAK supports the use of 3D models. OBJ models and other file types from products such as Pix4D can be imported via the Import Manager or can be manually placed in the atak/overlays folder prior to startup. If using Import Manager browse to the .OBJ file and import only that file or browse to a .ZIP file that contains the .OBJ file (and others) and import only that file. If importing via manual placement, place a .ZIP file containing the .OBJ file (and others) into the atak/overlays directory and they will be imported on startup.
Compass Interactions - 3D Model
Once imported, a 3D Model icon will appear on the map. Zoom into the area of the icon until a loading ring appears. After the loading process has finished, the 3D model will be projected onto the map. Enable the map 3D View and tilt the view angle to see the 3D modeling. Loaded 3D models will appear as their own category in Overlay Manager and can be toggled on/off or removed from there.

First Person View
ATAK provides the ability to view the map from a First-Person perspective. First-Person simulates the view of a user looking straight ahead towards the horizon rather than from the default overhead map view perspective. The First-Person tool can be activated from the Additional Tools and Settings menu.

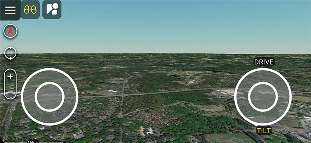
When selected, the First-Person Tool places buttons at the top of the map and two soft joysticks on the right and left of the map.
To enable the First-Person View perspective, select the First-Person View button and then tap the desired location on the map.

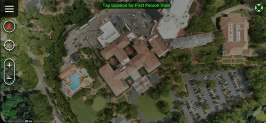
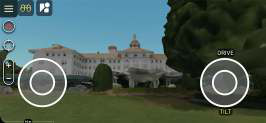
Once the map is in First-Person mode, the soft joysticks can be used to control the camera. The right joystick toggles between driving and tilting the camera view. The left joystick adjusts the elevation of the First-Person view. Elevation can be adjusted both above ground level and below ground level for a subterranean view.
Select the First-Person icon to disable First-Person mode and return to the default map view.

Display Controls
Two display modes are available when working with ATAK.

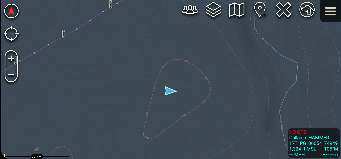
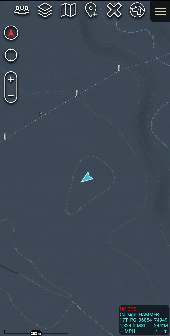
Select Orientation to swap the display mode from landscape to portrait or vice versa. Because ATAK is a moving map capability with a magnetic compass indicator, users will regularly move the device around as part of land navigation. The Orientation button allows the user to conscientiously select the orientation of the application independent of these land navigation movements. Changing the Orientation will close all open drop downs so they can be correctly drawn when used in the new mode.
Select Brightness to adjust the brightness of the map. Use the slider to fine tune the brightness level. Maps items and drop downs will be unaffected when adjusting the brightness. There are no changes to the contrast as part of this feature.


Source
ATAK 5.7 Software User Manual, 13 March 2026 (Unclassified), pages 7–11.